ERPNext Walkthroughs Selling
Field Sales: the visits map
See where each van went and what it sold, which shops have not been visited for a while, which areas sell most, and how a van's day compared with its plan.
Step 1 of 5
Every visit on a map
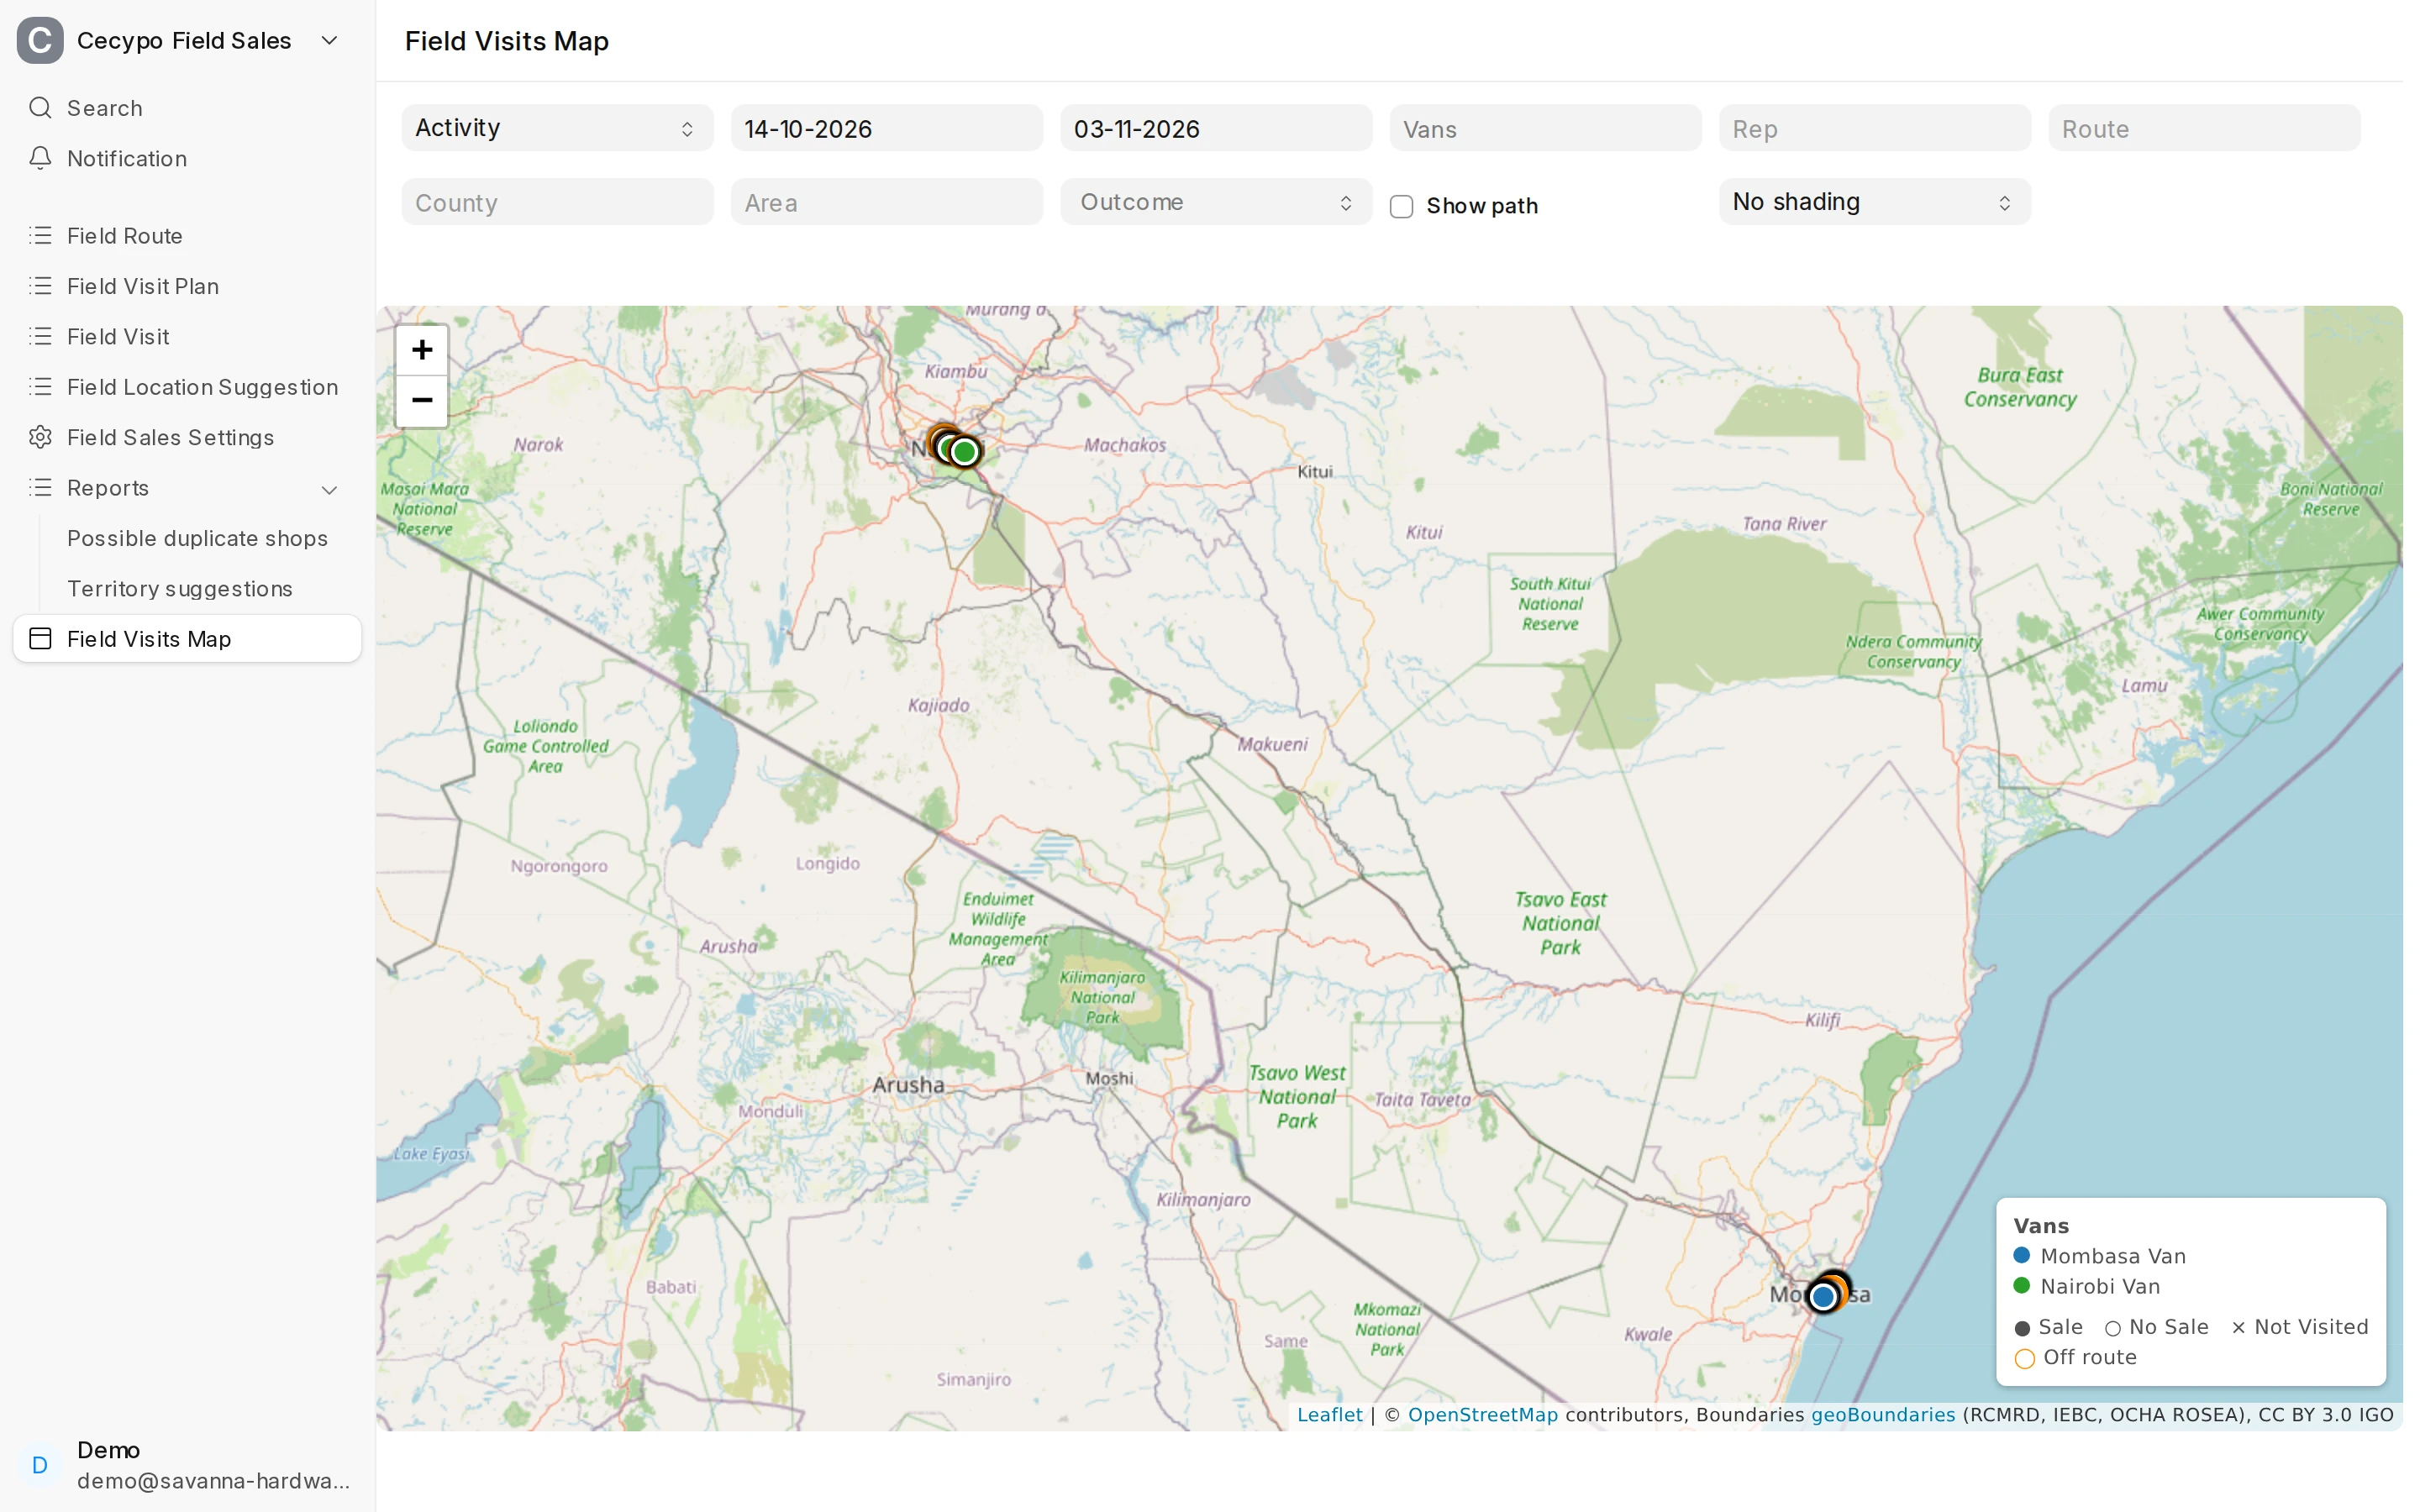
Field Visits Map puts every shop check-in on the map, one colour per van. Here it shows both vans over the last three weeks.
Arrow keys or space also move through the steps.
Steps
-
Field Visits Map puts every shop check-in on the map, one colour per van. Here it shows both vans over the last three weeks.
-
Pick the dates and the vans; the map redraws and zooms in. A filled dot is a sale, a hollow one a visit with no sale, and an orange ring marks a visit off the van's route.
-
Set Mode to Coverage: each pinned shop is coloured by the days since its last visit, so the shops nobody has called on stand out.
-
Choose Areas by sales in the shading list to colour each area by its sales over the dates chosen; counties, and visits instead of sales, work the same way. The legend gives the range for each shade.
-
With one van and one day chosen, the map compares the day with the van's Field Visit Plan. The line above the map counts the shops planned, visited and not in the plan; a grey ring is a planned shop nobody visited, and the outline shows the areas of the day's route.